

Everything You Need To Know About Decorating With Frosting
Ready to take your frosting skills up a notch? We’re here to help. Decorating your treats can be confusing, but with a few tricks and the right recipes, you’ll be creating beautiful, one-of-a-kind desserts in no time flat.
Select Your Frosting
The first thing you’ll need to decide is what kind of frosting to use. While there are a lot of options to choose from, we recommend using either a royal icing or a buttercream frosting. These are the go-to frostings for pastry chefs for a reason—their consistency is perfect for decorating and piping treats of all kinds!
Pro tip from C&H® Sugar: If you want to use an icing that looks as sweet as it tastes, try Royal Icing (with Meringue Powder). It’s delightfully made with meringue powder instead of egg whites, making it the perfect icing for everything from cookies to cakes.
Gather Your Supplies
Before you get started, there are a few things you’ll need, including:
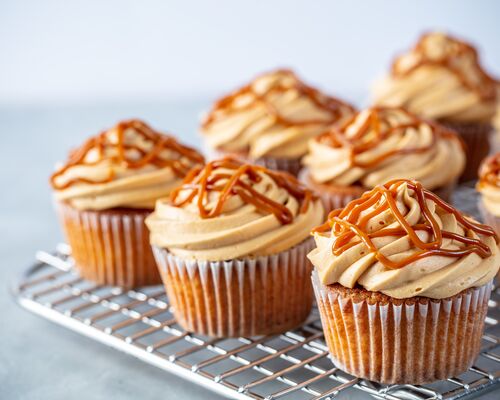
Prepare Your Frosting or Icing
Add A Little Color
If you’re making a vanilla buttercream frosting, a little color will go a long way. We recommend using natural colors, such as Spirulina (blue), Turmeric (yellow), Matcha (green), freeze dried strawberries (pink) and freeze dried blueberries (purple). Note: If you’re preparing a buttercream frosting with a flavor like Dulce de Leche Cupcakes or Brown Butter Cake with Brown Sugar Swiss Meringue Buttercream, you may want to leave them uncolored. Their natural characteristics and colors are often more appetizing without food dies.
Get Your Pastry Bag Ready
Whether you’re decorating with stars and swirls or dots and flowers, you’ll want to use different piping tips to create those sweet effects. Instead of emptying the bag every time you change tips, try using a coupler. Just trim the edge off the bag, slid the coupler into the opening and twist on your tip. When you’re ready for the next one, just replace the tip with no muss or fuss.
Fill Your Pastry Bag
While there’s technically no right or wrong way to fill your bag, the easiest way to do this is by placing a pastry bag over a tall glass. This will leave both of your hands free to scoop the frosting or icing. Just make sure not to fill the bag more than halfway full. This will make it easier to decorate later.
Eight Piping Tips for Creating Amazing Designs
You’re ready to start decorating! Here are eight techniques for creating breathtakingly beautiful frosting decorations for cakes, cookies and more.
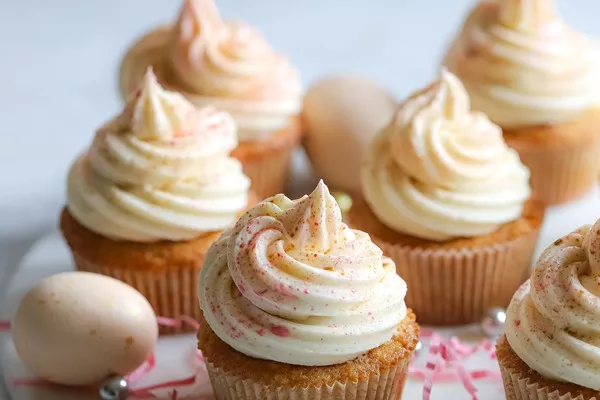
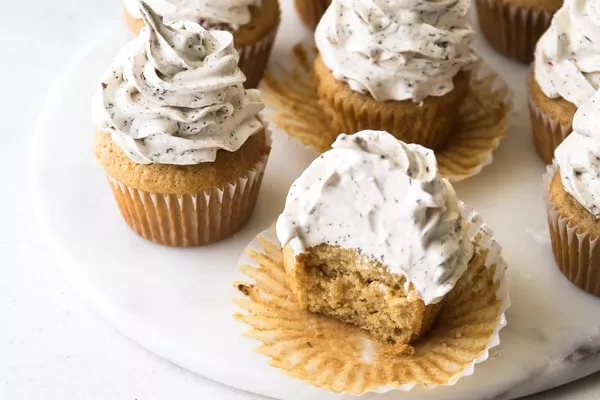
1. Swirls: A favorite for new and experienced bakers alike, swirls are created by making circular movements with your pastry bag. When you make this design, start with big circles at the bottom and make tighter and smaller rotations as you move up.
2. Stars: One of the simplest decorations to make, you just need a star piping tip and a steady hand.
3. Dots: The dot is an incredibly easy decoration to make. Just use any round piping tip and squeeze to the size you’re after. Note: If your dots have small points after pulling the tip away, dip your finger in water and smooth them out.
4. Rosettes: A beautiful flourish for any treat, you make rosettes with star piping tips. To prepare these, you start in the center and squeeze the pastry bag to make a star shape. Then, you move the tip down and to the side, slowly circling the star in the center with a clockwise motion.
5. Shells: One of the most popular piping techniques, shells are made with any star-shaped tip. You just press, slow the flow and stop to make a point. Then, repeat as many times as necessary.
6. Swirl Drop Flowers: Create this effect with a simple twist of the wrist! Using Tip 224 (for standard flowers) or Tip 2D (for larger flowers), you start off similar to the star technique, but as you squeeze, you rotate your wrist (outward) to create an overlapping-petal effect.
7. Zigzags: If you’re looking for a fun decoration to add to your treats, try zigzags. While traditionally made with a star tip, you can actually select any tip you like. To make this effect, move your piping bag side to side to make small waves. Then, make overlapping waves above and below.
8. Grass: A popular decoration for spring, you’ll need a specialty grass-piping tip to make this design. Simply squeeze the bag and pull away as you release. Note: To make the grass look more natural, pull the tip slightly to the left or right instead of straight up.