


Categories:
Ingredients
1 cup (two sticks) Unsalted butter
- 1 cup C&H® Granulated Sugar Easy Baking Tub
- 1/2 cup C&H® Light Brown Sugar
- 2 teaspoons Vanilla extract
- 4 Eggs, room temperature
- 2 1/4 cups All-Purpose Flour
- 1 teaspoon Baking Soda
- 1/2 teaspoon Salt
- 1 cup Buttermilk, room temperature
Browned Butter Cake
2 cups C&H® Light Brown Sugar
- 7 Egg whites
- 1 teaspoon Vanilla Extract
- 2 cups Salted Butter, room temperature (4 sticks)
For the Brown Sugar Swiss Meringue Buttercream
Rate Recipe
Instructions
For the browned butter cake
Step 1
Preheat the oven to 350°F. Grease and line two 8-inch cake rounds with parchment paper and set aside.
Step 2
To brown the butter, melt ½ cup (or one stick) of the butter in a small saucepan over medium-high heat. Stir the butter so the solids won’t remain in the bottom and burn. The butter will eventually start to froth and start to toast, keep moving the pan around until the center of the melted butter starts to brown. Remove from the heat and pour into a mixing bowl.
Step 3
To the mixing bowl, add C&H® Granulated Sugar Easy Baking Tub, C&H® Light Brown Sugar, and vanilla and mix. Add in the additional ½ cup of butter at room temperature and beat until combined. Add in the room temperature eggs two at a time, beating to combine between additions.
Step 4
In a separate bowl, mix the flour, baking soda, and salt together, and stir to combine ingredients well.
Step 5
Add 1/3 of the flour mixture to the browned butter mixture and beat to combine. Add in half of the buttermilk and beat to combine. Repeat this step, adding the final dry ingredients last. Mix together just until you no longer see flour.
Step 6
Divide batter evenly between the cake rounds and place in preheated oven for 35-40 minutes, until a toothpick comes out clean when inserted in the center. Let the cakes cool at least 10 minutes before turning out onto a cooling rack. Once completely cooled, level off the top of the cakes with a bread knife.
For the Brown Sugar Swiss Meringue Buttercream
Step 1
Over a double boiler (about two inches of steaming water in a saucepan with a glass or metal bowl fitted over the top), add in the C&H® Light Brown Sugar and egg whites. Mix the ingredients together while the sugar granules start to melt into the egg whites. This should take anywhere between 10-15 minutes. Check by pinching the mixture between your fingers to check for any granules. Continue until all the granules are melted and a gelatinous mixture appears.
Step 2
Pour the mixture directly into a standing mixer with a whisk attachment. Beat on low until frothy, then turn up the speed slowly as the mixture starts to lighten. Once up to full speed, let the mixture whip until stiff glossy peaks appear. To check for peaks, dunk the whisk into the meringue, life up and turn the whisk right side up. The meringue should stand straight up, and the top will fall subtly to the side. Similar to soft serve ice-cream.
Step 3
Place the whisk back onto the standing mixer. Add in the vanilla and a few tablespoons of the butter, turn the mixer on to medium. Once the butter has mixed into the meringue, add in the next two tablespoons of butter. Continue this step until the butter has all been used. The mixture might start to look like it’s separated, that’s okay.
Step 4
Turn up the mixer to high and beat the mixture until it starts to thicken. This can take several minutes depending on the resident temperature. If you find that the mixture is still soupy and won’t thicken, place the bowl into the fridge for 15 minutes, then beat again.
Step 5
Once thickened, turn off the beater and press the buttercream against the edges of the bowl with a spatula to remove the excess air.
Assemble
Step 1
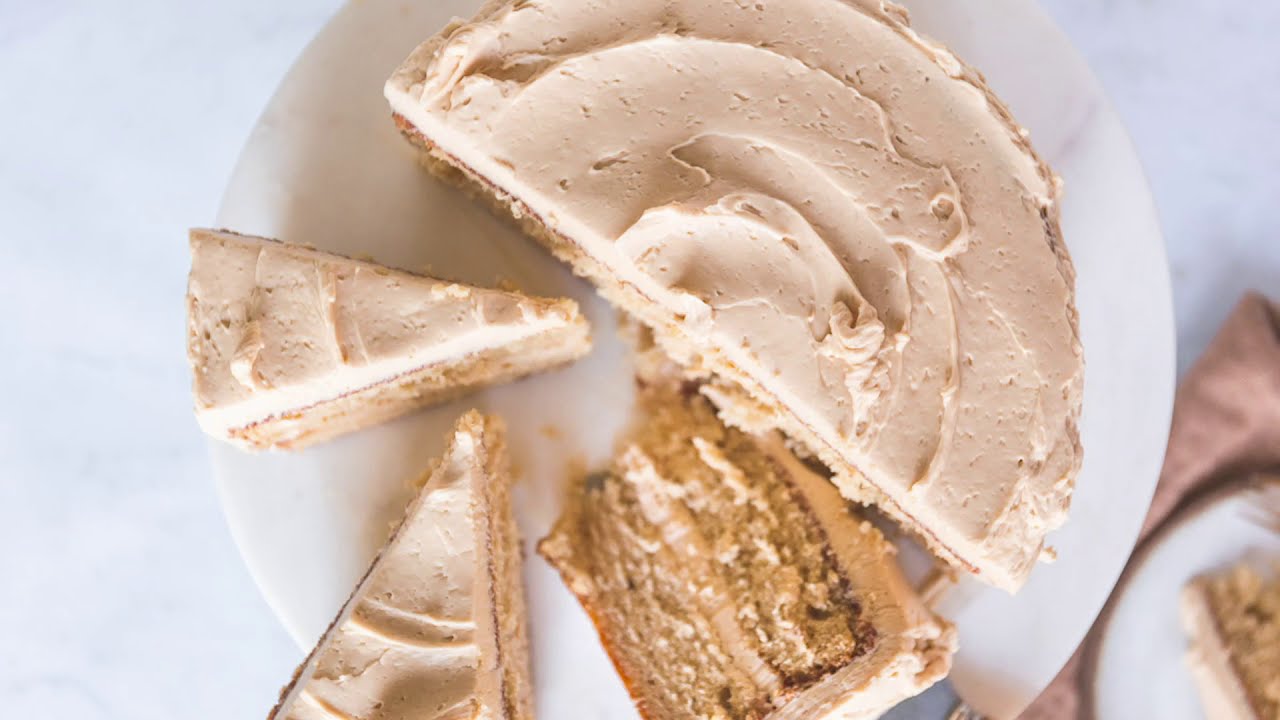
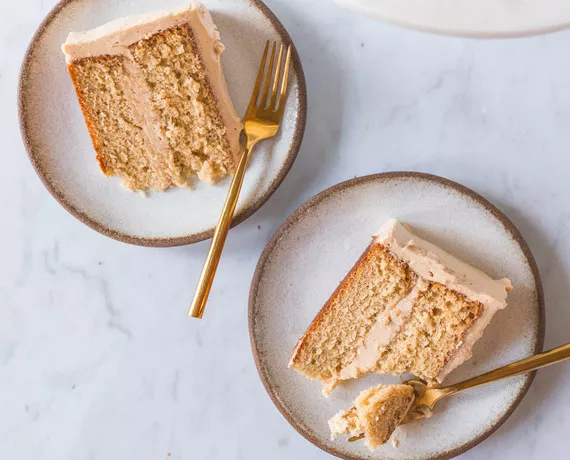
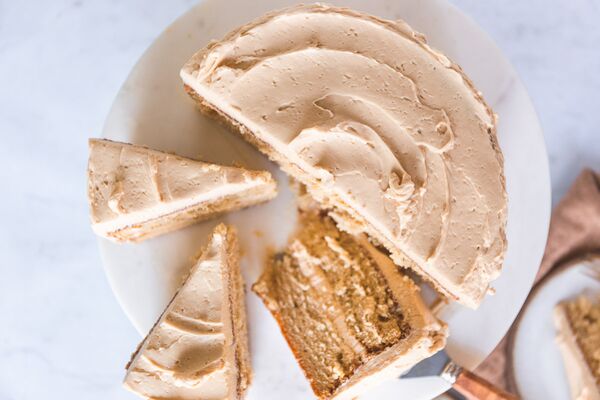
Take a small amount of buttercream and place it on the center of the cake plate. Place one layer of the cake on top and press to adhere. Add about 1 ½ cup of the buttercream to the center of the cake and smooth. Add the last layer on top and press to adhere. Completely coat the rest of the cake with the remaining buttercream. Enjoy!
Additional Tips
1. The best part about this cake is that it won’t get a grainy or crusted outer layer the next day. Keep fresh by covering and placing in the fridge. Let the cake come back to room temperature before serving. Keeps up to 3 days.
2. A standing mixer is almost completely necessary to make the frosting because of the beating time and power needed. You might be able to get away with using a hand mixer, but it will probably double the amount of time to make.
3. Save the cake scraps by placing in a zip lock back and into the freezer. Cake scraps make great cake pops when the time comes!
Rate Recipe

Recipe by
Karlee Flores
@summeroficedtea
Karlee Flores is an award-winning photographer, blogger, and videographer. She’s the creator of Olive and Artisan, a blog that brings home all the comforting words and recipes to her readers. Karlee spends most of her time recipe testing in her Portland Oregon kitchen with her cat, Bruce Wayne and bring back the fun in baking.
Sign Up
Sign up to receive new recipe inspiration, product information, special offers, and more.